
Buying the right binder is step one. Getting the most out of it is step two.
Most binding guides focus on safety rules and sizing — and those things matter. But there’s a whole layer of practical knowledge that doesn’t get written down anywhere: how to actually put the thing on, how to position your chest for the flattest result, why your binder might be rolling or bunching, and how to build daily habits that make binding easier over time.
This guide fills that gap. It’s aimed at people who already have a Transform binder — or are about to — and want hands-on, experience-based guidance rather than another set of rules.
Getting your binder on correctly from the start makes everything else easier. The technique varies slightly depending on which style you have.
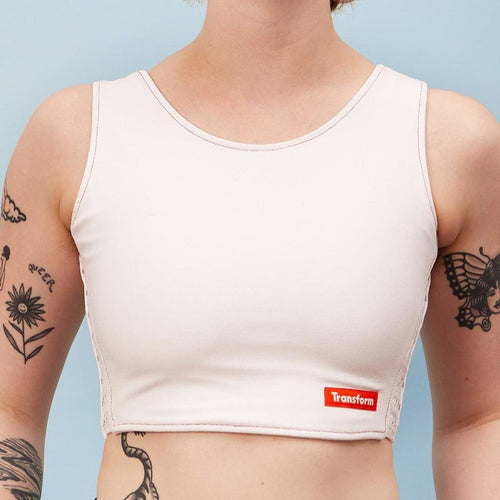
Pull-on styles (Sensory Compression Vest, Limited Edition Crop, Tank Binder)
These styles go on like a fitted t-shirt. There are two main methods — try both and use whichever works for your body:
It will feel snug and a little awkward the first few times. It genuinely gets easier with practice — within a week or two most people have a technique that takes under a minute.
The Adjustable Crop has a different approach because of its fastening system:
Start on the loosest hook setting and adjust from there. You can always tighten once it’s on — this is one of the main advantages of the adjustable style.
Putting the binder on is only half the job. How you position your chest tissue inside it makes a significant difference to your result — and this is something most guides skip entirely.
The goal is to redistribute tissue outward toward your armpits rather than letting it sit centrally. Central stacking is what causes the “uni-boob” effect.
The lying-down method (most effective for a flat result):
The standing method:
Tissue type affects how well this works. Softer tissue redistributes more easily and tends to produce a flatter result with less compression. Firmer tissue may take more effort to reposition but responds well once in place. Neither is better or worse — they just behave differently.
If you’re not getting the result you expected, technique is often the first thing to check before assuming your binder is the wrong size or style. Our Chest Binder Size Guide can help you confirm your measurements are right too.
What a Correct Fit Actually Feels Like
This is one of the most common sources of confusion — particularly for first-time binders who aren’t sure what “normal” feels like.
A well-fitting binder should feel:
You should always be able to:
Signs a binder may be too small:
A binder that’s too small won’t produce a flatter result — it will just cause discomfort and restrict your breathing. If you’re unsure whether your fit is right, our team is always happy to help — reach out via our contact page.
The binder rolls up at the hem
Rolling at the hem is more common with crop-length styles. If it’s happening consistently, first check that the binder is pulled down to sit correctly at your natural midriff rather than riding up on your torso. If rolling persists regardless of positioning, a tank-length style — which extends to the hip rather than ending at the midriff — may suit your body shape better.
Uneven compression side to side
Most common with the Adjustable Crop Binder. Almost always caused by the hook settings being different on each side. Check both sides are on the same setting — they should be a mirror image of each other.
The ‘uni-boob’ effect
Caused by tissue sitting centrally rather than being redistributed outward. Go back to the positioning technique in the section above — the lying-down method is particularly effective for this.
Skin irritation at the edges
Usually caused by one of three things: the binder is slightly too small and the edge is digging in; the skin is staying damp with sweat; or you’ve been wearing it too long. Take a break from wearing it until the skin heals, and reassess the fit. If it’s a heat or sweat issue — particularly common during summer months — breathable styles like the Adjustable Crop and Sensory Vest are designed to help with this.
The binder feels tighter later in the day
This is normal and happens to most people. Natural body swelling through the day, combined with heat and physical activity, can make a binder feel noticeably firmer by late afternoon than it did in the morning. If this is significant, the Adjustable Crop is particularly useful because you can loosen it slightly without removing it.
Under a white or light-colored shirt
Binder color matters here. Our white, peach and lavender binders are all designed to sit invisibly under light fabrics. A black or dark binder under a white shirt will often be visible — if this is a concern for school, work or a specific occasion, color choice is worth thinking about.
Under fitted clothing
Fitted clothing shows compression lines more than loose clothing. For the smoothest result under a fitted shirt or t-shirt, take extra care with positioning and make sure the binder edges are sitting flat rather than folded or bunched. Crop-length styles generally give a cleaner line under fitted tops than tank styles.
Under loose clothing
Looser clothing is more forgiving and works well with any style. If you’re having a day where the binder doesn’t feel quite right, a loose-fitting outer layer helps a lot.
Layering in different seasons
In cooler months, a light layer under or over your binder adds warmth without significantly affecting compression. In summer, choose breathable binder styles, light fabrics on top, and stay hydrated — heat makes binding harder on your body.
Crop vs. tank under different outfits
Crop-length binders sit at the midriff and work well under most tops, especially with high-waisted bottoms. Tank-length binders extend to the hip and can show at the hem under shorter tops, but layer much more naturally under loose shirts, jackets and formal wear.
The practical habits around binding matter as much as the binder itself.
Start the clock as late as possible
Put your binder on as close to leaving the house as you can. The recommended maximum is 8–10 hours per day — there’s no benefit to wearing it longer than you need to, so don’t start early.
Take it off promptly at the end of the day
As soon as you’re home and don’t need it, take it off. Don’t let it drift longer than necessary just because you haven’t got around to it.
What to do when you take it off
Take a moment after removing your binder to:
Binder-free time
Taking days off from binding — or even just evenings — gives your body a chance to recover. This is easier said than done depending on your circumstances, but even occasional binder-free time makes a difference to long-term comfort. Loose clothing, sports bras or nothing at all are all valid options for binder-free days.
Breaking in a new binder
A brand new binder will feel firmer than one you’ve worn for a while. If your new binder feels very firm on the first day, that’s normal — the fabric softens slightly with washing and wear. Start with shorter wear times in the first week or two and build up. If it’s still uncomfortable after a few wears, it may be the wrong size — get in touch and we’ll help you work it out.
Further Reading
Chest Binder Size Guide — how to measure and confirm your size
Chest Binder Safety Guide — practical guidance for comfortable binding
How Long Can You Wear a Chest Binder — wear time recommendations and what the research says
Chest Binder Comparison Guide — which binder style is right for you
Browse the full Transform Transwear binder range, or contact us if you need help with fit or sizing.